Saturday, July 2, 2016

Colored pencils review


I am an artist as well as a colorist for adult coloring books, when KJColors offered this set of colored pencils to me for free in exchange for my honest opinion/review, I jumped at the opportunity. I received 48 colored pencils in a canvas roll up wrap pencil holder, it also contained a cheap paint brush, a cheap pencil sharpener and a Faber-Castell brand blue eraser, all of this was inside a retail box. The pencils were pre-sharpened and arrived intact, no leads were broken.

The first thing I did was take out all of the pencils and arrange them in a more pleasing arrangement for me, by color family, they were close but I have different ideas as to how my colors should be arranged 😊. They come with a good assortment of colors, the only colors that might be considered to fall short are the yellows, there are only 2 yellows, but if you are clever you can get past that.

I was a bit perplexed by the eraser, being a premium name brand, Faber-Castell, I wondered about how well these colors might erase, I was pleasantly surprised to discover they erase quite nicely, kudos to KJColors!

The pencils are hexagonal in shape so they will not roll around, I like that,. The barrels are nice and straight, they are painted with the color of the lead and match up for the most part, there are a few that aren't even close, so a color chart swatch should be done, something I recommend anyhow.

Now down to the important business, how it colors. I'd say they were midrange, they aren't premium high end but you aren't paying premium prices for these. They are definitely higher quality than what you would get in your local dollar store. I colored a page in a coloring book, the colors lay down smoothly and layer & blend nicely. They are a medium hardness/softness, allowing you to get different looks based on how hard you press. None of them broke while I used them, they didn't wear down any faster than I expected them to.


The pencil case is a nice touch, the pencils fit one to a slot and will not fall out, there is also a spot to hold the paintbrush, sharpener and eraser. There is a faux leather flap that covers the sharpened end of the pencils to protect the leads. This wrap rolls up and has a snap fastener so you can take your pencils securely on the road.

The pencil sharpener and paintbrush are really cheap, but they work.

My wish list for future versions:
1. Put color names on the pencils, or at least put numbers on them that correspond with the colors

That's it, that is the only thing I can find wrong. 😊
#‎KJColors48PremiumColoredPencilsSet‬ ‪#‎WrethaReviews‬ ‪#‎KJCOLORS


Friday, July 1, 2016

Review Teasers

I'll have a few fun goodies to review this weekend, here is a picture featuring one I'm really excited about, see the pretty colors?

Friday, June 17, 2016

Problem solved

I'm on the cloud,  or is it in the cloud? Either way,  I know this has nothing really to do with art,  and yet it does for me. If you found this by doing a search for how to see a hard drive attached to a router (Belkin Share N300 is mine)  on an Android device,  scroll down to the directions below.

First a little background as to how this happened,  I had spilled a full cup of very sweet full creamer coffee on my laptop a few months ago,  needless to say,  it stopped working,  I had my files backed up on an external USB hard drive. The laptop was a total loss,  I did save its hard drive, but nothing else. So for now I am relying on 2 tablets to get me through until I can purchase another laptop.

I have the kind of router that you can hook up an external USB hard drive to and can see it through the network,  I thought this would be great,  I can still access all of my church music (I'm the choir director and provide all the music for my church),  I can access everything I need on that hard drive.  Wrong.  It seems you have to use a program provided by Belkin to access the hard drive on the router,  it only works on another computer,  they don't have an app that works on an Android device,  I was told this by a Belkin tech on their own forum...

I searched and searched for a way around this,  all I found was other people seeking the same answer. Well today,  after looking for a couple of weeks and installing & uninstalling app after app,  I finally found an app that will allow me to see my external hard drive through the network.

DIRECTIONS

  • Go to https://play.google.com/store/apps/details?id=lysesoft.andsmb and install the free app
  • You will obviously need to have your router set up,  turned on and have an external hard drive attached and be using an Android device to access all of this
  • Open the app and tap on the little plus icon in the upper right,  when you first do this, could will not see the little blue icon in the picture below
  • Next type in the IP address of your router where it says "hostname" ,  add the password if you have set one up previously (note: this is not your wifi password,  this is the one you may have set up to get into the settings of your router through a browser,  try leaving it blank if you didn't set up a password),  and tap save at the bottom
  • Now tap the new icon you see in the middle and you should see your network and the attached hard drive,  mine says "My_Passport" 
That's it,  easy easy easy, I wanted to post this so that it could be found by other people who are struggling to find an Android app that will allow them to see a network attached hard drive. 

Tuesday, June 7, 2016

New directions

Looks like I need to revamp this blog,  when I first started it was all about my new love,  Zentangle,  I did enjoy it for a while, but oh are we ever fickle,  we meaning me.  I turned back to my first love, which is art,  painting and drawing.  Along with some photography for fun.  So anyhoo,  I'll be working on getting shed of the tangling links and such (shed is a southern term meaning rid) and start focusing more on what I love to do.

One of those things is adult coloring books,  not like rated X, but geared more toward grown ups,  more sophisticated lineart,  even some grayscale pictures to color.

I've begun to dip my toes into making a coloring book,  but in order to get yourself out in front of the pack,  your name needs to be known,  I have become a member of a coloring team,  not sure I can divulge the name so I'll have to be hush hush for now,  let's just say that it's not just a single artist,  it's a monthly publication with various artists so I have a variety of images to choose from to color. I'll be posting some of the colored pages here as soon as I can. The images I've colored are for next month's issue so I have to wait for the magazine to come out before I can publicly post them.

UPDATE
I asked about telling people about being on the coloring team and was given permission,  it's the Color On!  magazine,  I am really excited to be on this coloring team because I am going to have access to many different artists' work,  not just one artist or one style.

I have downloaded pictures from some of the current issues and will be coloring & posting them in the next few days.

Monday, May 23, 2016

West Texas photography

I love taking pictures, and now that I'm not working 12+ hours a day, I have more time to dedicate to my passion. If you read the previous few posts here, you will know that I use my tablet to snap all of my pix, this little Samsung Galaxy Note 8 takes really good pictures, since discovering a couple of good apps, I can tweak the photos in an artistic manner.

Here are some recent images I took, hope you enjoy.


Monday, April 4, 2016

Photography Magic with a Tablet or Smartphone

Often the difference between an OK picture and a WOW picture is just a matter of angles, the composition. The great thing about using a tablet or phone to take a picture is you have that screen to view the potential picture before snapping that picture. Don’t be afraid to move your camera around, change the angles to get a more pleasing view. Don't worry about what you look like, right then, all that exists is you, your tablet or phone, and your subject.

Here are a couple of tricks I use to get better pictures, first I get as close as possible to the subject, tablets & phones are not known for their ability to zoom, sometimes I end up forgoing a shot that would be terrific if I had a camera with a zoom lens, but that doesn’t happen very often. Make sure your settings on your camera app are set to the maximum quality, that way you can always zoom in and crop on the resulting photo if necessary. The photo examples I include here are in grayscale so you can focus on the composition.


I fill the frame with the subject, sometimes that means I have to get up higher (climbing on something) or getting lower, on the ground, having a tablet that has a voice activated camera app comes in handy about then.

If you can’t get in close, but still want to get the picture, then my second trick comes into play, I use a prop to “frame” the shot. One of my signature styles is to use an old fence post up close and personal on the side of the shot, the older, gnarlier and covered with wire the better, I get close enough to the post that you almost get splinters, then I have the subject of the shot in the rest of the picture, usually a mountain, sunset or some other equally scenic scene.

...

Sometimes I get lucky and have something to frame the scene on both sides, for me that usually ends up being trees, I walk around, holding up my tablet, gauging the scene as it moves across my screen, once the picture is what I want to see, I snap the picture.


Don’t be afraid of snapping lots of pictures, it’s not uncommon for me to go out for a short time only to discover I took 100+ shots. I then spend time going through the shots and pick out a few of the best and delete the rest. Sometimes I get nothing, none of the shots are worth keeping, but that’s OK, it’s all part of the game, and it’s only digital, no film was injured in the process. :)

Wretha Smith
http://www.WestTexasDoodleBug.com/
wretha@gmail.com

Saturday, April 2, 2016

I have a secret to share, I use a tablet to take pictures

I love taking pictures, as you can see, the job I have (that pays the bills) is merchandising, I get to drive all over west Texas to service the dollar stores in our region. On average I put 500-900 miles a week on my truck. As a result, I get to see some beautiful countryside, at all times of the day (and night), in all kinds of weather and mostly by myself. Since I don't have a concrete schedule, it's usually OK if I take a little longer to get to work, or to get home, I sometimes stop quite a bit to snap pictures.

I don't have an expensive camera, in fact I don't really have a camera at all, I take all of my pictures with a tablet, shocking but true. I have a Samsung Galaxy Note 8.0, it's an 8 inch size screen. The camera it has is pretty good for a tablet, and even with the stock camera app that comes with it, I find I can take pretty decent pictures. It's only limitation I have found is it doesn't do zoom very well, it can zoom, but it quickly gets pixelated and can't really zoom in very far at all. For the most part, I don't use the zoom feature, rather I take pictures at the maximum quality, then I can enlarge & crop later as I need to.

After taking all those pictures, I still need to edit my photos, tweak them and make them pop, I discovered a FREE app called Snapseed, I know they make it for Android, and here for IOS. This app does some really fantastic things to photos, there is really too much for me to describe here, mainly what I use is the HDR filter, it really makes my photos pop! Since it completely free, not even as much as an annoying ad and nothing to unlock, it's worth your time to install it and play with it, if it doesn't thrill you, you can always remove it.

The other app I recently ran across is called "A Better Camera" (link for free version) (link for unlocked version), I know it works for Andriod, not couldn't find anything for IOS. They have a free version that lets you use most of the features and allows you to take a small number of pictures using the premium features, I didn't even use up all of the free photos before buying the unlocked version. It's a really good bargain, even at full price, I believe it's under $10 to unlock, and you can put the unlocked version on more than one device, I don't know what the limit is, but I paid for it once and have it on 3 devices.

You use that app instead of your standard camera app, I have been using and learning about this app and absolutely LOVE it. It allows you to take HDR pictures, and it has a feature in the regular picture part called "DRO", it allows the device to see closer to what you see with your eyes, colors are bright, contrast is better, even in low light it takes great pictures.

You can do video with this app, but it doesn't work right with my devices, honestly I don't care, I bought it for what it can do with photos, it apparently isn't an issue with many other users, I don't see very many comments about that bug on their Google Play page.

When you take pictures with this app, it gives you the opportunity to save the unaltered images so you can choose between them, sometimes I prefer the unaltered image, but most of the time I love the tweaked image. When you choose HDR, it takes 3 pictures, one light, one medium and one dark, it then combines the images into a composit using the best of each image. The nice thing is you don't need a tripod, or even have to worry about being perfectly still, it seems to be able to deal with slight movements between frames, obviously the more still you can hold the device, the better the end result.
I did go in and tweak some of the settings, on the HDR settings, I knocked back the amount of color it enhances so the photos have a more realistic look, I also made the "noise" less. I set all the images to save at the maximum quality, it takes up more room per picture, but that is fine with me, that's what that extra memory card is for, right?
I have discovered that most of the time, I have to use one or the other, Snapseed taken with regular settings on my device camera, or take pictures with "A Better Camera" app, so far if I try to run a photo through Snapseed that I took with "A Better Camera" app, it tends to look worse, so when I am out in the field, taking pictures, I try to remember to use both the camera apps, so I have the most options for the pictures when I'm done.

Now you know some of my "secrets", I'll write a few more posts later on explaining how to get better pictures from your phone or tablet, of course this will also translate to those using real cameras too.
:)
Let me know what you think about this blog post, too long? Not enough? Any questions are welcome and will be answered if I can.

Wretha

Tuesday, March 22, 2016

Party Colored Lion

I have several adult coloring books now, I have been experimenting with printing them out on cheap printer paper as well as higher end watercolor paper. This image came from a very inexpensive coloring book found in the Dollar General stores, you will have to go back to the children's coloring book & puzzle books to find this one, it's called Coloring Cats & Dogs and it's published by Bendon Books.

There are 3 titles in this series, and they all run $3.00 each, yes that's right, they are that inexpensive. Yet the paper quality is pretty good, and they are printed one sided, meaning you can color on a page without worrying about bleed through messing up what's on the backside. If you are using a medium that really bleeds through, like markers, it's recommended that you put another sheet of something behind the page you are coloring.

I colored this page with Marco Raffine colored pencils, they come in a 48 and a 72 pack, I have the largest pack, unfortunately they are not available open stock, but they are inexpensive enough, especially compared to the higher end colored pencils that it will not break the bank to buy another entire set. These pencils are an oil based pencil (as opposed to a wax based), they lay the color down pretty well and they layer beautifully. You can blend these as well.

My approach to this picture was to lay down a layer of the lightest color first, then gradually going into the areas where there would be shadows and shading, I applied increasingly darker colors in the same color family, for example, going from a light yellow, to a medium, then to a near brown. I wanted even more contrast so I picked up the black pencil and colored in the deepest shadows and shading.

Since this lion had so much small details drawn in (doodle style), I chose to color in blocks rather than trying to color in the tiny details, I also used very strong and unnatural colors, I wanted to play with these vibrant colors instead of trying to use natural colors for a lion. You may notice the one spot on the left side of the mane that is slightly browner than the rest of the mane, that was where I had started a few days earlier and didn't keep up with the colors I was using, it also shows that I'm not perfect... but I am very happy with how this turned out. If you wish to see how I do this, let me know and I'll be happy to make a video tutorial on how I do this.

Enjoy, click the images to see them full size.

#wrethareviews

Monday, March 21, 2016

Coloring Books - Experimenting

Adult coloring books are all the rage right now, I hope it's not just a fad and will be around for a good long time. I'm even considering tossing my name in the hat of creating coloring books.

But for now, I'm just playing with what's out there. Of course I can't leave well enough alone, I must push the boundaries of what can be done. Most coloring books are not meant to be archival, meaning the paper isn't the best, in order to keep the price low enough for people to want to buy, the publishers are using the only slightly better paper for the adult coloring books vs the children's books. If you are just coloring with inexpensive colored pencils or even crayons, that works out OK, but if you want to use wet media, markers or watercolor (pencils or paint), then the average adult coloring book paper leaves a lot to be desired.

As a result, many colorist will scan the pages and print them out on better paper, from cardstock to higher end art papers such as Bristol board and watercolor paper. If you have a laser printer, you are pretty much set to go from there, but many of us use ink jet printers, and unless you have a printer that will use a higher end ink that doesn't smear once dry, you will have a problem the moment you add anything wet to the page, the ink will most likely smear. Of course using dry media is fine on ink jet printouts, but if you are going to use watercolor or something else that is wet, you are heading for disappointment.

I just happen to belong to several Bible art journaling groups, and one thing most Bibles have in common is thin thin thin pages, and nearly anything you put on them, especially the wetter mediums, will nearly always bleed through, so the resourceful artists tried using clear gesso and even matte gel mediums on the paper and discovered it works great, it strengthens the paper, it protects the paper, it helps prevent bleed through. Guess what? This works GREAT for coloring book pages and the pages you print out.

I began to experiment with ink jet printouts on inexpensive (cheap) printer paper, I have coated the pages with clear gesso and also tried matte gel medium, so far I prefer the matte gel medium. I discovered that the clear gesso can cause the ink to smear a bit, but the matte gel medium does not affect the ink jet ink in any way, and one coat is sufficient. Be sure you use a MATTE finish product, anything that is glossy or shiny will not take the color you are trying to apply very well.

Here is a page I painted using Derwent Inktense blocks and pencils, I was liberal with the moisture and had no bleed through, the paper didn't fall apart, the page took the Inktense very well, in fact, it allowed me to treat it more like a watercolor in that I was able to lift some of the color in places to create highlights. Derwent Inktense applies and works like watercolor, but it is in fact an ink that dries permanently so you can do multiple washes without affecting the layer below.

I have not tried painting or coloring on a page with the clear gesso yet, that will be an upcoming project. I have read from other artists that using colored pencils is better over the clear gesso vs the matte gel medium because of the "tooth" that is created by the gesso. I will tell you that with the matte gel medium, the brand doesn't seem to matter, I use Liquitex matte gel medium, but in the clear gesso, it does matter, most of them are too rough to use markers over, they will ruin your markers, Liquitex clear gesso seems to be the worst, the better brands (smoother finish) are Art Basics clear gesso by Prima, Dina Wakley clear gesso by Ranger, and Tri-Art clear gesso.

This picture is from The Amazing World of Horses, just to recap, this was printed out on cheap printer paper with an ink jet printer, I coated one layer of Liquitex matte gel medium, let that dry then painted with Derwent Inktense blocks and pencils, let me know what you think :)


Sunday, February 28, 2016

DIY Grey Scale Images

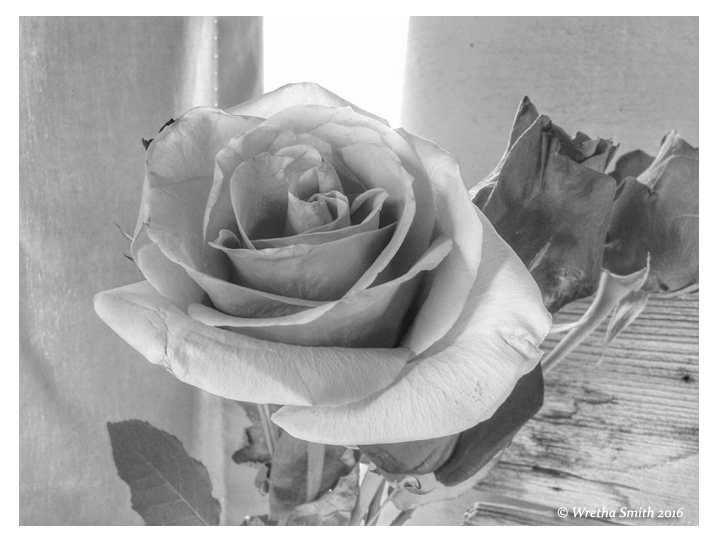
Unless you have been living under a huge rock, and even then I'd wonder about ya, then you have heard about adult coloring books, they are all the rage right now. The next step from the simple (and not so simple) line art, is grey scale (or gray scale) coloring, there are a few grey scale coloring books out there, but how fun would it be to create your own grey scale images from your own photographs?

Now you can, there is an app for that! It's called Snapseed, it's a completely free app put out by Google, it will work for both Android and IOS (iPad & iPhone) devices, it will work on your phone and your tablet, sorry there isn't a version of this for your computer, but I believe most of us have smart phones now.

I created a quick (well quick for me LOL) video showing how to turn a full color image into a grey scale image that you can save, print out and color yourself. There are other programs that will desaturate (remove color) but they can make the image flat, or there may be too much dark in the image, Snapseed is great in that it allows you to adjust the image so it doesn't look flat and isn't too dark.


I'll include the images I edited, the before and after, you are welcome to download, edit with Snapseed, copy, print and color the images for your own personal use, you may share your colored image, please don't use them for any commercial purposes, please leave my copyright in the images, and I'd appreciate a link back to this page.

Original image, full size, full color, click on the image, then right click and save, both images below have a white border for easier printing.


Grey scale image for you to print and color, this should print out on a 8.5X11 inch paper in portrait layout, click on image, then right click and save the image.
 

Be sure to let me know how this works for you, and if you post any pictures of your colored roses, please leave a link below so I can see it :)

You can find me on many of the adult coloring book FaceBook groups, hop over and say HI!
https://www.facebook.com/groups/greyscalecoloring/
https://www.facebook.com/groups/ColoringBooksForAdults/
https://www.facebook.com/groups/788845437850785/
https://www.facebook.com/groups/brightsidecoloring/

Wretha

keywords
grey scale, gray scale, grayscale, greyscale, adult coloring books,

Monday, July 6, 2015

Another Elegant Writer Painting

I will say that this kind of art is improving my handwriting skills, something I have never been very proud of, my cursive writing when I was in school (back in the stone age) was terrible at best, and tended to change if I had to write a long page of text, slanting right, then left, if I didn't have lines to follow, the script wandered up and down and was just generally a mess.

I have been looking at hand writing fonts on my computer, but only to pick out a few letters I want to feature, I have ended up doing my own thing on most of these types of artworks.

I am still playing and experimenting with the Elegant Writer pen, I did another small picture for my niece who came out to visit over the holiday weekend with her mom (my sister) and her dad. I am pretty happy with the handwritten cursive text, I did do it lightly in pencil first, just to get the layout, then went over it with a Micron marker (03 I believe), I then erased the pencil then went back over the letters to give some weight to them.

Here is the picture, you can click on it to make it larger.

Sunday, July 5, 2015

Elegant Writer Watercolor Art

I absolutely love YouTube and the wonderful (generous) artists who create tutorials and upload them there. One I found a while back and rediscovered it recently features a calligraphy pen called the Elegant Writer by Speedball. Someone figured out that the black ink in that pen, when activated by water, bleeds out in shades of gray, blue, purple, pink and even some greens. These colors are spontaneous, you can't really control the colors, but if you blot the ink/water mix while it's still wet, you can bring out the more pinky colors.

I am experimenting with this pen now, since I love watercolor, this is a natural for me, you can leave the colors that happen as is, or you can add more color with watercolor, colored pencil or whatever you like, you can also add Micron pens to the mix, those do not bleed when wetted with water.

Here is a quick card I made just a few minutes ago, with the exception of the green in the stem, all the rest of the color happened as a result of using the Elegant Writer and water. I wrote the quote using the Elegant Writer but chose not to wet that, preferring the crisp letters.

Let me know what you think?


Wednesday, June 17, 2015

Bible Art Journaling

I have been turned on to another art practice, it's called Bible Art Journaling, it's a way to combine art with the Bible. There are many groups on FaceBook, Pinterest, YouTube and the such with wonderful artists displaying their journaling Bibles. I finally jumped in and purchased 2 notetakers Bibles, these have wide blank margins on the side of each page where you can write notes, or create art to illustrate (or illuminate) a particular scripture or chapter.

This is the first one I have done, I bought 2 Bibles because I wanted to give one to a good friend of mine, who is also an artist and LOVES to write in her Bibles, I have seen some of her Bibles that have more ink that she added than the original text, and that is a good thing, that means she is really involved in her walk with the Lord.

I did this lion, it illuminates the scripture Proverbs 28:1b ...but the righteous are bold as a lion.


This is what I put in the front of the Bible, I searched for an appropriate quote to express my feelings to my friend, I am happy with this. The flowers I learned how to do from a very talented artist Michelle Hotchkiss, you can see the video tutorial she did below.


Wood Post Painting Finished

Here it is, my wooden fence post is complete, I did finish it the day I said I would, but haven't had the chance to post anything about it lately, been working some crazy hours, not complaining, I love my job (merchandising), I do get to drive all over some beautiful country and this spring, the wildflowers were gorgeous, I stopped more than once to grab a photo of a flower, fence post or sunset.

Here is the finished painting, I added the rusty wire and tweaked it here and there. This picture is now some 500 miles east of here in my mother-in-law's house, she plans on framing it and hanging it on the wall, quite a compliment, she is a wonderful artist in her own right.


Sorry for the copyright stuff, but unfortunately there are those few unscrupulous folk who take advantage....

I'm sure I'll be doing this painting again, it's turning into an old friend :) I will most likely omit the branches that hang down in the upper right, they are in the original photo, but I just don't like how they look in the painting. I am happier with how the wood post turned out, and the pine tree on the left, it looks more like the tree in the original photo.

Wretha

Sunday, May 10, 2015

Wooden Post Landscape part deux WIP

I really enjoyed painting the first Wooden Post Landscape picture, but knew I wanted to do it again, I started last week, worked on it today (yesterday now) for about 2 hours each time, I am so happy with how this one is turning out, there is much more detail and more accuracy in this one, I love painting and drawing wood, the post is much more like the real post out in my yard, especially the old nail holes. One thing I did differently than the original photo is I made the mountains more prominent, they almost vanish in the background, so I made them stand up a bit higher.

Of course right now this is a WIP, not finished yet, I hope to get it done after church tomorrow, I need to work on the closer dark branches on the right, and I need to add the old, curled, rusty fence wire. I must study how the wire moves away on the right side to make the perspective look right.

I created this using Fluid Watercolor block paper, hot press finish, 9x12, so far I have painted with Derwent Inktense Blocks, I'll use Derwent Inktense Pencils to do the wire fence.

Another thing I've started, well actually I'm waiting for 2 note takers Bibles to arrive, I am going to start Bible art journaling, I am very excited to do this, I hope the Bibles show up this next week, though I doubt I'll have time to start anything because it's going to be a very busy week at work, perhaps by the following weekend I can start... I'll post more about this as things start to happen. :)

Sunday, April 26, 2015

Wooden post landscape

My muse struck again, this time I decided to paint from one of my photos of the property.

This is the view looking toward the west, the wooden post came from a friend's house, the rusted wire came from a local ranch that was replacing their fencing, we got a few rolls of that wire. Lots of history in the post and wire.

I did this on Fluid Watercolor Blocks, 130 lb, 9x13, I used Derwent Inktense blocks and pencils to paint the picture, I started it about a week ago and put the finishing touches on it today. This is the first time I've used watercolor block paper, it's watercolor paper that is glued down on 2 (or more) sides so you can wet the paper without fear of buckling or warping, I really like it. This is the cold pressed paper, I just ordered the same brand and type but in a hot pressed form, I can't wait to try that.

I plan on painting from the reference photo again, maybe several times, I really like this view, and I need to polish up my trees, they look just fine here, but MY trees are more rounded (more cedar like-less fir like), I also want to improve the mountains in the background and the sky, basically everything, I'm very happy with the wooden post and the rusted wire.

I am giving this to a friend for her birthday, she saw it last week before it was fully completed, she liked it. I'm pretty happy with it too :) This is the first full page landscape painting I have done in quite a number of years, I'm thinking the last time I painted anything like this was over 30 years ago, I'm happy to get back into the swing of painting.

Thursday, April 16, 2015

Western Scrub Jay in Derwent Inktense

I am following a wonderful artist Rebekah R Jones, she does art journaling in Bibles, this intrigues me very much, I added more links to Rebekah at the bottom of the page.

This is my second attempt at art journaling in a book, I will eventually start working in a Bible, but want to get better (and more confident) before I start working in my Bible.

Here is my first attempt, I had to find a book I was willing to practice in, fortunately we have a plethora of books around here :) I also went to our local library and local used bookstore recently and found a Bible and another book that lays flat quite nicely. This picture was done in watercolor and ink.

Here is the painting I did today, it was done using Derwent Inktense blocks and pencils, the idea was to make it transparent enough to still be able to read the text below, the picture above I got a bit heavy with the brown on the roof, I am a lot more satisfied with the picture from today, I worked in thin transparent layers, building up each layer until I was happy with the amount of color. You can tell I am happy with this one because I signed it :)

I joined a free site called Paint My Photo, it's a place where very fine photographers upload their photos specifically for artists to use as reference, I have been uploading pictures of my local area, landscapes, animals, flowers and such. This is my first painting done from a photo there.

Rebekah R Jones blog, FaceBook, YouTube, Pinterest.

Saturday, March 28, 2015

CRE8365 Day who knows :)

I have gotten so far behind on my "daily" creations, I have no hope of catching up, I have done quite a few that I haven't posted here, so I'll go ahead and post the ones I have done, no more counting them though, I'll create and post, KISS (keep it simple stupid) is my motto now :)

digital art girl

digital art uppity groundhog

photo art view from my yard

digital art armadillo

digital art baby

naughty bears

line art sketch-windy day in the garden

windy day colored with colored pencils

quick pencil sketch of cacti

digital art psycho rabbit

a snapshot of a snowy icy drive

http://www.cre8365.com

Saturday, January 31, 2015

CRE8365 Day 31 - One Daisy

Today was a conflicted day for me, it's been cloudy, overcast and rainy, we NEED this moisture, no doubt about that, but all these overcast days are not so good for my solar system (we are 100% solar powered), today it was foggy all day, which is normally a cool thing, it makes everything look mysterious. But because we aren't getting much sun, I have had to curtail my internet usage quite a bit, now THAT bums me out, I've just been doing the minimum I could on my computer and internet has been a challenge.

I have had to remind myself about the good things about living the way we do, this simple life, we have food, we have great friends and neighbors, we are healthy, we have shelter, my walk with my Lord is stronger than ever, so who am I to complain?

Today, I went through all of my photos and found a simple daisy, white petals with a yellow center, it reminded me that spring is coming, dreary winter will soon be over, and life is good.

I did this using Autodesk SketchBook Pro mobile, and finished it in Photoshop.

On a happier note, I have completed the month of January and received this button
 

http://cre8365.com/activity/